It prints with tick boxes and without the site's menus.
Six weeks or more out: approval and the plan
- Find your district's field trip approval form and its deadline, and ask your principal what they need to see with it.
- Ask the venue for its rules for school groups: group size, how many adults it wants with the students, where you can eat lunch, and the price per student.
- Request the buses through your district, or get a written quote from a bus company.
- Work out the cost per student from admission, the buses and anything else, so the letter home can name one number.
Four weeks out: the permission form and the roster
- Put emergency contacts and the health questions on your school's permission form, so the answers come back with it.
- Build the roster from the class spreadsheet you already have. The Trip Binder imports names, grades, student IDs, parent contacts, health columns and any column of your own, such as lunch choice. It remembers how you matched the columns, and keeps that when you reuse or duplicate the trip.
- Add a group column and a bus column if you already know them. The import puts students into their groups, and the Buses page offers to make the buses from that column.
Read more: Free roster template · What medical information to collect · Import your roster
Three weeks out: chaperones
- Work out how many adults you need. Your district's policy and the venue each may set a number, and the stricter one wins.
- Invite chaperones by email from Staff & permissions. They sign in with Google, Microsoft or an emailed code, and they never pay.
- Give each chaperone one named group of students. If a chaperone should see and mark only their own students, turn on Restrict to group for that group.
- Send your chaperones a short briefing: their group, how to count, and what to do if a student is missing.
Read more: How many chaperones you need · What to tell your chaperones
Two weeks out: tell families
- Send the letter home with the date, the times, the cost, what to bring and how families will hear about changes.
- Give families a way into the trip. Share the trip code, or print each student a ticket with their own traveler code and a parent code.
- Share the trip with parents. Until you do, families see nothing of the trip in the app.
- Put the packing list and the map in Documents with Who can see it set to Everyone, so parents find them on their child's trip page.
Read more: Letter templates for parents
The week before
- Put every student on a bus, then number each bus from 1 so students can say their number as they board.
- Add the schedule, with a map pin for each stop and a meeting point and time wherever the group splits up.
- Have every chaperone open the trip in the phone app once on Wi-Fi. After that the roster, emergency contacts and schedule work with no signal.
- Ask chaperones, students and parents to allow notifications.
- Run one practice count-off, so students know to answer to their number.
- Export a paper copy of the roster as a printable PDF or a spreadsheet, and put it in your bag in case a phone dies.
The day of the trip
- Count at every stop, not just on the bus. Every chaperone marks students on one shared list, and one person taps Notify staff so the rest of the staff hear the result once.
- Run the bus count-off before the bus moves, every time.
- If a student leaves with a parent, mark them away from the group so the counts stop expecting them.
- When plans change, send a meeting point. Everyone the event is for gets a notification that opens the spot on a map.
- Remind students that Ask the staff reaches every staff member on the trip at once.
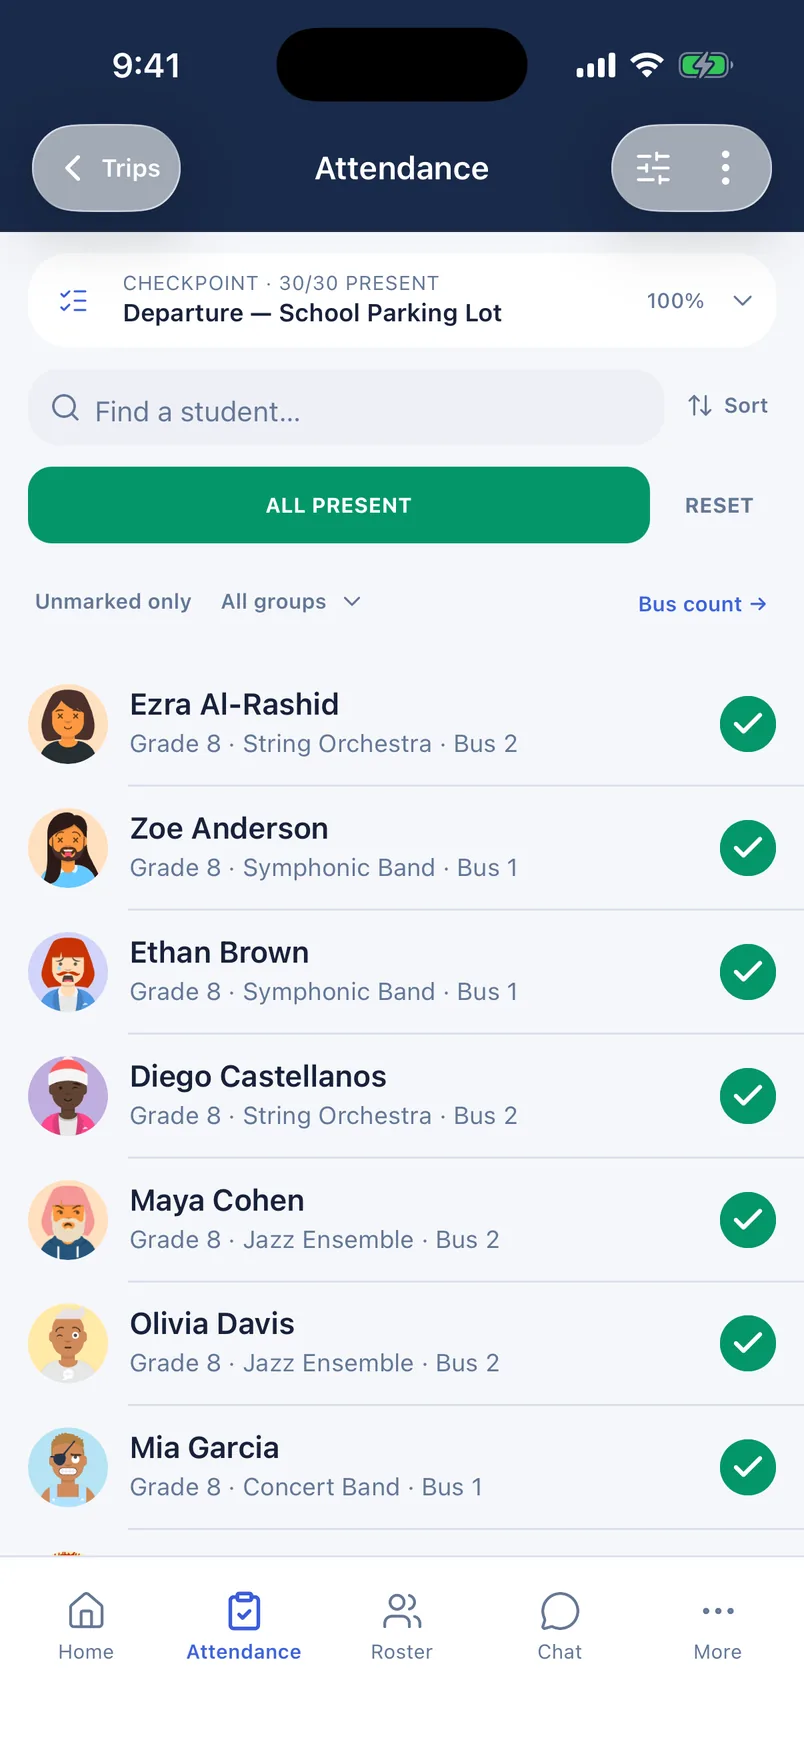
Every chaperone marks the same list, so the total fills in for everyone.
After you get back
- Count everyone off the bus, and follow your school's rules for who may pick a student up.
- Health information and emergency contacts are deleted 30 days after the trip ends. If your school keeps a copy, export it first with Include health details switched on.
- Going again next year? Reuse the trip for new dates, for free. The roster, buses and schedule come with it.
Common questions
- Is there a free field trip app for teachers?
- Yes. The Trip Binder is free for day trips at any roster size, with unlimited travelers and chaperones. That includes the roster, attendance, bus count-offs, the schedule, chat and trip documents. Overnight trips and trips with several travel days need the Pro plan.
- What should a field trip checklist include?
- It should cover approval and the venue's rules, a permission form with emergency contacts and health questions, the roster, enough chaperones with a group each, a letter to families, buses with a number for every rider, a schedule with meeting points, a head count at every stop, and the trip home.
- How far ahead should a teacher plan a field trip?
- Start six weeks or more before a day trip, and earlier if your district's approval deadline asks for it. Your district's own deadline is the one that counts, so check it first.
- Do chaperones need to download an app?
- It helps, but it is not required. Chaperones can use the free iPhone or Android app, which keeps working with no signal, or open the trip on the website in any browser. Chaperones never pay.
Run your next trip on The Trip Binder
Day trips are free at any roster size, with unlimited travelers and chaperones. Build the trip on the web, then run it from the app on iPhone or Android.